blog

Cap digitizing challenges

Overcoming Common Challenges in Cap Digitizing: Expert Tips from Punch Digitizing

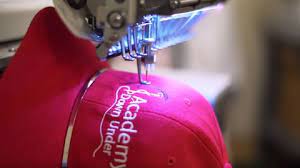
Introduction Cap digitizing is a specialized field that involves converting designs into a digital format compatible with embroidery machines. While the process opens up endless creative possibilities, it also presents a unique set of challenges. As a leading service provider in the USA, Punch Digitizing has tackled these challenges head-on, ensuring high-quality results for businesses across the country. In this blog post, we’ll explore some of the most common challenges in cap digitizing and share tips on how to overcome them. 1. Understanding the Unique Shape of Caps The Challenge: One of the primary challenges in cap digitizing is working with the curved and sometimes irregular surfaces of caps. Unlike flat garments, caps have a structured form that can make it difficult to position designs accurately. The Solution: To overcome this, digitizers must take into account the shape and contour of the cap during the design phase. Using specialized digitizing software allows for precise adjustments, ensuring the design fits perfectly on the curved surface. Techniques: Use grid guides within your software to align elements of your design accurately. Consider the center-out method when digitizing to ensure that your design sits symmetrically. Adapt your design for the most common cap types, such as structured and unstructured caps, to ensure flexibility in application. 2. Dealing with Design Complexity The Challenge: Complex designs with intricate details pose significant challenges in cap digitizing. The small surface area available on a cap means that every element of the design must be carefully planned to ensure visibility and clarity. The Solution: Simplification: Simplify complex designs without losing their essence. Focus on key elements that convey the message. Stitch Type Selection: Choose appropriate stitch types for different parts of the design. For instance, use satin stitches for lettering and small details, and fill stitches for larger areas. Testing: Always run a test stitch to see how the design translates from screen to fabric. Adjust as needed based on the test results. 3. Managing Thread Tension and Density The Challenge: Thread tension and density are crucial factors in cap digitizing. Incorrect settings can lead to issues such as puckering, thread breaks, or a design that doesn’t lay flat against the cap. The Solution: Tension Settings: Adjust your embroidery machine’s tension settings to match the cap’s fabric and the design’s complexity. Experiment with different settings to find the optimal balance. Density Adjustments: Keep an eye on the stitch density. Overly dense designs can lead to thread breaks, while too loose designs may not cover the cap properly. Consider the type of fabric you’re working with when setting the density. If you’re curious about how fabric types can impact digitizing, explore more about how fabric type affects the digitizing process. 4. Handling Different Fabric Types The Challenge: Caps come in a variety of materials, from cotton and wool to synthetic blends. Each fabric type presents its own challenges regarding needle selection, thread type, and digitizing technique. The Solution: Needle and Thread Selection: Choose the appropriate needle and thread for the fabric. For example, a ballpoint needle is ideal for knit fabrics, while a sharp needle suits woven materials. Fabric Testing: Conduct tests on small sections of the cap fabric to see how it responds to different stitch types and densities. Adjust your digitizing approach based on these tests. For a deeper dive into this topic, consider reading about how fabric type affects the digitizing process . 5. Ensuring Accurate Alignment The Challenge: Maintaining alignment throughout the digitizing process is crucial for achieving professional results. Misalignment can lead to skewed designs that detract from the overall appearance of the cap. The Solution: Hoop Selection: Use the correct hoop for the cap size and style. A cap hoop or frame specifically designed for curved surfaces can help maintain alignment. Positioning Marks: Utilize positioning marks or templates to ensure that the cap is properly aligned in the embroidery machine. This helps in maintaining consistency across multiple caps. Digitizing Strategies: Employ digitizing strategies such as sequence planning, where elements of the design are stitched in a specific order to maintain alignment and reduce movement. Discover more about managing alignment and other factors affecting the cost of cap digitizing. 6. Navigating Thread Breaks and Machine Issues The Challenge: Thread breaks and machine malfunctions can disrupt the digitizing process and lead to delays or subpar results. The Solution: Regular Maintenance: Keep your embroidery machines well-maintained to reduce the likelihood of thread breaks and malfunctions. Clean and oil your machines regularly, and replace worn parts as needed. Quality Threads: Use high-quality embroidery threads that are less prone to breaking. Consider using threads designed for high-speed machines for optimal performance. Monitoring: Keep a close eye on the machine during operation to catch issues early. If a thread break occurs, pause the machine and carefully re-thread to avoid further issues. 7. Customizing Designs for Specific Needs The Challenge: Different clients have different needs, and customization is key to meeting those expectations. However, this can be challenging when dealing with unique designs and specifications. The Solution: Client Collaboration: Work closely with clients to understand their vision and requirements. Offer suggestions and expertise to help them achieve their desired results. Flexibility in Design: Be flexible and willing to adapt your designs to suit the client’s needs. This may involve altering color schemes, adjusting design elements, or incorporating logos. Prototype Development: Consider creating prototypes for client approval before proceeding with large-scale production. This allows for adjustments and ensures client satisfaction. Explore how caps play a crucial role in corporate marketing strategies to understand how businesses leverage customization. 8. Managing Bulk Orders and Deadlines The Challenge: Handling bulk orders while maintaining quality and meeting deadlines is a common challenge in the cap digitizing industry. The Solution: Efficient Workflow: Develop an efficient workflow that prioritizes quality and speed. Automate repetitive tasks where possible and ensure that your team is well-trained. Resource Allocation: Allocate resources effectively to manage bulk orders. This includes having enough staff, machines, and materials to handle high demand. Communication: Maintain open

Overcoming Common Challenges in Cap Digitizing: Expert Tips from Punch Digitizing Read More »

car vector art

How Do I Prepare My Artwork for Vector Digitizing?

Hey there! If you’re planning to get your artwork digitized for embroidery, you’re in the right place. Preparing your artwork correctly is crucial for ensuring that the final embroidered product looks amazing. At Punch Digitizing, we know how important it is to get this right. Let’s walk through the steps to prepare your artwork for vector digitizing. Understanding Vector Art Before diving into the preparation steps, it’s essential to understand what vector art is. Unlike raster images, which are made up of pixels, vector art consists of paths and points. This means vector art can be scaled to any size without losing quality, making it perfect for embroidery. If you’re new to this, you might want to check out our article on what are the latest trends in vector art digitizing to get some background knowledge. Step 1: Choose the Right Software To create vector art, you need the right software. Popular choices include Adobe Illustrator, CorelDRAW, and Inkscape. These programs offer the tools you need to create precise and scalable vector designs. If you’re not familiar with these tools, many online tutorials can help you get started. Step 2: Start with a Clean Design Your design should be as clean and simple as possible. Remove any unnecessary details that might not translate well into embroidery. Remember, what looks good on a screen might not always look great when stitched on fabric. Simplifying your design helps maintain clarity and quality in the final product. Tip: Use solid shapes and clean lines. Avoid gradients and shadows, as these are challenging to replicate in embroidery. Step 3: Use High-Contrast Colors High-contrast colors make it easier to distinguish different parts of your design. This is especially important for embroidery, where color differentiation can impact the final look. Ensure your design’s colors are distinct and easy to separate. Tip: Choose thread colors that closely match your design colors. This ensures the final embroidered product closely resembles your original artwork. Step 4: Outline Your Design Outlining your design helps define its edges and makes it easier for the digitizer to create accurate stitch paths. Use a contrasting color for the outline to ensure it stands out against the rest of your design. Tip: Keep outlines consistent in width. Irregular outlines can complicate the digitizing process and affect the final result. Step 5: Consider the Size and Placement Think about the size and placement of your design on the final product. Ensure the design is appropriately scaled for the item it will be embroidered on. For instance, a design for a cap will need to be much smaller than a design for a jacket back. Tip: Measure the area where the design will be placed and adjust the artwork accordingly. This ensures the design fits well and looks balanced. Step 6: Save in the Right Format Once your design is ready, save it in a vector format. Common vector file formats include .ai (Adobe Illustrator), .eps (Encapsulated PostScript), and .svg (Scalable Vector Graphics). These formats preserve the paths and points needed for precise digitizing. Tip: Avoid saving your design as a raster file (like .jpg or .png) because these formats don’t retain the scalable qualities of vector graphics. Step 7: Communicate with Your Digitizer Clear communication with your digitizer is key. Provide them with all the necessary details about your design, including the size, colors, and any specific instructions. The more information you provide, the better the final embroidery will match your vision. Tip: Share your design mock-ups and any relevant color codes. This helps the digitizer understand your expectations and replicate the design accurately. Common Mistakes to Avoid While preparing your artwork, be mindful of these common mistakes: Overcomplicating the Design: Too many details can get lost in embroidery. Keep it simple. Ignoring the Fabric Type: Different fabrics react differently to embroidery. Discuss fabric choices with your digitizer. Using Too Many Colors: Stick to a limited color palette to ensure clarity and reduce complexity. Forgetting to Test: Always request a sample or test run to catch any issues before final production. How Punch Digitizing Can Help At Punch Digitizing, we’re here to make the digitizing process as smooth as possible. Here’s how we can assist you: Expert Advice: Our team offers expert advice on how to optimize your design for embroidery. Whether you need help with simplifying your artwork or choosing the right colors, we’re here to guide you. High-Quality Digitizing: We use state-of-the-art software and techniques to ensure your design is digitized with the highest precision. This means your final embroidered product will look sharp and professional. Custom Solutions: Every project is unique, and we provide custom solutions to meet your specific needs. From corporate logos to personal projects, we tailor our services to ensure your satisfaction. Quality Assurance: We conduct thorough quality checks to ensure the final product meets your expectations. Our commitment to quality means you can trust us to deliver top-notch results. Conclusion Preparing your artwork for vector digitizing doesn’t have to be daunting. By following these steps and working with experienced professionals like Punch Digitizing, you can ensure your designs are transformed into beautiful embroidery. Contact us for more information.

How Do I Prepare My Artwork for Vector Digitizing? Read More »

embroidery vector art services

How Is Vector Art Digitizing Used in Embroidery?

Hi there! If you’re curious about how vector art digitizing fits into the world of embroidery, you’re in for a treat. Here at Punch Digitizing, we specialize in transforming your designs into beautifully embroidered masterpieces, and vector art digitizing plays a crucial role in that process. Let’s dive into the fascinating ways vector art digitizing enhances embroidery. The Basics: What Is Vector Art Digitizing? First things first, let’s break down what vector art digitizing is. In simple terms, it’s the process of converting artwork into a digital format that embroidery machines can read. Vector art is perfect for this because it’s made up of paths and points, which can be easily scaled and manipulated without losing quality. This precision is essential for creating detailed and intricate embroidery designs. The Process of Vector Art Digitizing for Embroidery Design Creation It all starts with a design, which can be anything from a company logo to a custom illustration. The design is first created or imported into vector graphic software like Adobe Illustrator or CorelDRAW. This software allows for precise control over the design elements, ensuring every detail is perfect. Conversion to Vector Format If the design isn’t already in vector format, it’s converted at this stage. This step is crucial because vector graphics can be scaled to any size without losing clarity, which is vital for ensuring the embroidery looks sharp and professional. Digitizing the Vector Art The vector design is then imported into embroidery software. This software converts the vector paths into stitch paths, mapping out exactly how the embroidery machine will sew the design. The digitizer can adjust stitch types, directions, and densities to ensure the final product meets the desired quality. Testing and Refining Before the final embroidery is done, a test run is typically performed. This helps identify any issues with the design, such as areas where stitches might overlap or where the fabric might pucker. Adjustments are made as needed to refine the design. Why Vector Art Is Ideal for Embroidery Precision and Detail: Vector art allows for incredibly precise designs, which is essential for embroidery. The ability to control every point and path means that even the smallest details can be captured. This is particularly important for logos and intricate designs where clarity is crucial. Scalability: One of the standout features of vector graphics is their scalability. Whether you need a tiny logo on a shirt or a large design on a jacket, vector art maintains its quality at any size. This flexibility is invaluable for embroidery projects that come in various sizes. Easy Modifications: With vector art, making changes to a design is straightforward. Need to tweak a color or adjust a shape? No problem. These modifications can be done quickly and easily, allowing for rapid iterations and customizations. Applications of Vector Art Digitizing in Embroidery Corporate Branding: Businesses often use embroidery for branding purposes, such as on uniforms, hats, and promotional items. Vector art digitizing ensures that company logos and branding elements are reproduced accurately and consistently, enhancing the professional look of the apparel. Custom Apparel: From sports teams to fashion designers, custom apparel is a big market for embroidery. Vector art digitizing allows for personalized designs that cater to individual tastes and styles. Whether it’s a custom monogram or an intricate pattern, digitizing ensures the design looks flawless. Merchandise and Promotional Items: Embroidered merchandise like bags, hats, and jackets are popular promotional items. Vector art digitizing ensures these items look sharp and professional, making a strong impression on clients and customers. Home Décor: Embroidery isn’t just for apparel. It’s also used in home décor items like pillows, towels, and wall hangings. Vector art digitizing allows for detailed and personalized designs that add a unique touch to home interiors. Special Events: Events like weddings, graduations, and anniversaries often feature custom embroidered items. From monogrammed napkins to personalized gifts, vector art digitizing makes it possible to create memorable and unique items for these special occasions. How Punch Digitizing Enhances Your Embroidery Projects At Punch Digitizing, we take pride in our meticulous approach to future application of vector art digitizing. Here’s how we ensure top-notch quality for your embroidery projects: Expert Digitizers: Our team of expert digitizers has years of experience in converting vector art into flawless embroidery designs. They understand the intricacies of different fabrics and how to optimize stitch types and densities for the best results. State-of-the-Art Software: We use the latest embroidery software to ensure precise and high-quality digitizing. This technology allows us to handle even the most complex designs with ease, delivering results that exceed expectations. Customization and Personalization: We know that each project is unique, and we offer extensive customization options to meet your specific needs. Whether it’s a corporate logo or a custom design, we work closely with you to ensure the final product is exactly what you envisioned. Quality Control: Before any design is finalized, it undergoes rigorous testing and quality control checks. We make sure every detail is perfect and that the embroidery will look great on the final product. The Future of Vector Art Digitizing in Embroidery As technology continues to advance, the future of vector art digitizing in embroidery looks bright. Here are a few trends to watch out for: Automation and AI: Automation and AI are making their way into embroidery digitizing, promising even faster and more accurate conversions. These technologies can analyze designs and optimize stitch paths automatically, reducing the time and effort required. 3D Embroidery: 3D embroidery is gaining popularity, and vector art digitizing plays a key role in creating these dimensional designs. By manipulating stitch densities and directions, digitizers can create stunning 3D effects that add depth and texture to embroidery. Sustainable Practices: Sustainability is becoming increasingly important, and vector art digitizing can contribute to eco-friendly embroidery practices. Digital proofs and virtual samples reduce the need for physical samples, minimizing waste and conserving resources. Conclusion Vector art digitizing is an essential component of modern embroidery, offering precision, scalability, and flexibility. At

How Is Vector Art Digitizing Used in Embroidery? Read More »

vector art for shirts

What Are the Future Applications of Vector Art Digitizing in Various Industries?

Hey there! Ever wondered where the future is heading with vector art digitizing? It’s a fascinating topic, and as a leading provider of digitizing services across the USA, Punch Digitizing is here to give you the scoop. Let’s explore how different industries are set to benefit from the advancements in vector art digitizing. Revolutionizing the Fashion Industry The fashion industry is one of the prime beneficiaries of vector art digitizing. Here’s how: Custom Embroidery: Vector art digitizing plays a crucial role in creating intricate embroidery designs. With precise vector files, machines can stitch detailed patterns on fabrics, enhancing the quality and appeal of garments. This precision is essential for high-end fashion brands that demand perfection. Pattern Making: Designers can use vector art to create and modify patterns easily. This flexibility allows for quick adjustments and customizations, catering to the ever-changing fashion trends. The ability to rapidly iterate on designs ensures that fashion brands can keep up with the fast-paced industry. Sustainable Fashion: As the industry shifts towards sustainability, vector art digitizing helps minimize waste. Digital patterns can be tested and perfected virtually before any material is cut, reducing fabric wastage. This not only saves costs but also aligns with eco-friendly practices. Enhancing Marketing and Advertising Marketing and advertising rely heavily on visuals, and vector art digitizing is becoming increasingly important in this sector. Here’s why: Scalable Graphics: Vector art can be scaled infinitely without losing quality, making it perfect for creating logos, banners, and other marketing materials that need to look sharp at any size. Whether it’s a small business card or a huge billboard, vector graphics maintain their clarity. Interactive Content: The future of marketing lies in interactive content. Vector art digitizing allows for the creation of engaging, interactive graphics that can be used in digital marketing campaigns. Think interactive infographics, dynamic web banners, and engaging social media posts. Augmented Reality (AR): Vector art can be integrated into AR experiences, providing an immersive way for brands to engage with their audience. Imagine a customer pointing their phone at a product and seeing a detailed, animated vector graphic come to life, explaining features and benefits. Transforming Education Education is another field where vector art digitizing is making significant strides. Here’s how it’s changing the game: E-Learning Materials: Vector art is used to create clear, concise, and visually appealing educational materials. These materials are essential for e-learning platforms that rely on engaging content to keep students interested. Interactive Diagrams: Vector graphics are ideal for creating interactive diagrams and illustrations. These can be used in subjects like biology, geography, and engineering to provide students with a hands-on learning experience. Interactive diagrams help in breaking down complex concepts into understandable visuals. 3D Models: With advancements in 3D vector art, educational institutions can create detailed 3D models for various subjects. Whether it’s a model of the solar system or an anatomical representation of the human body, 3D vector art enhances the learning experience. Impacting the Gaming Industry The gaming industry is continuously evolving, and vector art digitizing is playing a pivotal role in its development. Here’s how: Game Assets: Vector art is used to create game assets like characters, backgrounds, and objects. The scalability of vector graphics ensures that these assets look great on any screen size, from smartphones to large monitors. Animation: Vector graphics are perfect for creating smooth animations. In gaming, where fluid motion is crucial, vector art ensures that characters and environments move seamlessly. Virtual Reality (VR): As VR becomes more mainstream, vector art is used to create immersive environments. The precision and scalability of vector graphics make them ideal for detailed VR experiences, enhancing the overall gameplay. Advancing Architecture and Engineering Vector art digitizing is also making waves in architecture and engineering. Here’s how: Blueprints and Schematics: Vector graphics are used to create detailed blueprints and schematics. These precise drawings are essential for construction projects, ensuring that every detail is accurately represented. 3D Renderings: Vector art can be used to create 3D renderings of architectural designs. These renderings provide a realistic view of the project, helping architects and clients visualize the final outcome. CAD Integration: Vector art is easily integrated with Computer-Aided Design (CAD) software. This integration allows engineers to create detailed technical drawings and models, streamlining the design process. Boosting the Print Industry The print industry continues to thrive with the help of vector art digitizing. Here’s how: High-Quality Prints: Vector art ensures that printed materials are of the highest quality. Whether it’s business cards, posters, or brochures, vector graphics maintain their clarity and sharpness. Custom Printing: The ability to create custom vector designs allows for personalized printing solutions. Clients can have unique, tailor-made designs for their printing needs, from personalized stationery to custom packaging. Eco-Friendly Printing: With digital proofs and virtual samples, the print industry can reduce its environmental impact. Vector art digitizing helps in minimizing waste by perfecting designs before they go to print. Streamlining Product Design and Manufacturing Product design and manufacturing benefit immensely from vector art digitizing. Here’s how: Prototyping: Vector art is used to create detailed prototypes of products. These prototypes can be tested and refined before mass production, ensuring that the final product meets all specifications. Laser Cutting and Engraving: Vector files are essential for laser cutting and engraving processes. The precision of vector graphics ensures that the cuts and engravings are accurate, resulting in high-quality products. Customization: Vector art allows for easy customization of products. Manufacturers can offer personalized products that cater to individual customer preferences, enhancing customer satisfaction. Conclusion The future applications of vector art digitizing are vast and varied, impacting numerous industries in innovative ways. At Punch Digitizing, we’re excited about these advancements and how they can benefit our clients across the USA. Contact us whether you’re in fashion, marketing, education, gaming, architecture, print, or manufacturing, vector art digitizing has something to offer.

What Are the Future Applications of Vector Art Digitizing in Various Industries? Read More »

vector art digitizing

The Latest Trends in Vector Art Digitizing

Hey there! If you’re curious about the latest trends in vector art digitizing, you’ve come to the right place. As a top provider of digitizing services across the USA, Punch Digitizing is always on the lookout for what’s new and exciting in our field. Let’s dive into some of the coolest trends shaking up the world of vector art digitizing. AI and Machine Learning: The Game Changers AI and machine learning are revolutionizing how we create and digitize vector art. Imagine this: AI algorithms can now look at raster images and magically (okay, not really magic, but close) convert them into vector formats. This tech saves so much time and effort, especially for big projects that need super high precision. It’s like having a super-smart assistant who never sleeps. Next-Level Software The software we use for vector art digitizing keeps getting better and better. Here are some awesome features you can expect: Automated Tracing: This feature automatically turns raster images into vectors with hardly any manual work. It’s like having a shortcut that actually works. Better Color Management: Ensures the colors in your digital designs look just as fabulous when printed. Cloud Integration: Work from anywhere and collaborate easily with your team. Perfect for those of us who can’t sit still in one place for too long. 3D Vector Art is Here Ever thought about vector art in 3D? It’s a thing now, and it’s huge in gaming, virtual reality, and augmented reality. With 3D vector art, you can create graphics that pop out and interact with users in exciting ways. Think detailed 3D models that you can spin around and look at from every angle. Cool, right? Personalization is Key These days, everyone wants something unique. Whether it’s for branding, merchandise, or just personal projects, people are after custom designs that scream “me.” At Punch Digitizing, we love creating personalized vector art that fits exactly what our clients are looking for. It’s all about those special touches that make a design truly yours. Going Green Eco-friendly practices are becoming a big deal in vector art digitizing. Companies, including ours, are finding ways to be kinder to the planet. This might mean using digital proofs instead of paper or cutting down on waste during the digitizing process. It’s all about doing our bit for the environment while still delivering top-notch work. Tech Integration Vector art digitizing is hooking up with other technologies like laser cutting, CNC machining, and embroidery. This means you can use vector art in more ways than ever. For instance, using vector art digitizing in embroidery  can make your designs more precise and detailed. Perfect for fashion and textiles! User-Friendly Tools The tools we use are getting easier and more intuitive. Whether you’re a newbie or a pro, modern software makes it simpler to create amazing vector art. Plus, with tons of tutorials and awesome customer support, there’s always help when you need it. Wrapping Up Vector art digitizing is constantly evolving, and these trends are just the tip of the iceberg. Staying on top of these changes helps us at Punch Digitizing provide the best possible service to our clients. Contact us, Whether you need custom vector art, 3D designs, or integration with other tech, we’ve got you covered.

The Latest Trends in Vector Art Digitizing Read More »

New trends in digitizing

Trends in 3D Puff Embroidery – New 3D Embroidery Ideas

The world of embroidery is constantly evolving, with new trends and techniques emerging regularly. 3D puff embroidery, known for its eye-catching and tactile appeal, is no exception. Staying updated with the latest trends can inspire your projects and keep your designs fresh and contemporary. In this blog, we’ll explore the current trends in 3D puff embroidery and how Punch digitizing incorporate it in  our work. Bold and Vibrant Colors One of the most noticeable trends in 3D puff embroidery is the use of bold and vibrant colors. Designers are increasingly experimenting with bright hues to make their designs pop. Neon colors, in particular, have gained popularity for their striking and modern look. These vivid colors enhance the three-dimensional effect of the embroidery, making it more eye-catching and dynamic. When incorporating this trend into your projects, consider the overall aesthetic and purpose of the design. Bold colors can be particularly effective in fashion items like hats and jackets, where they can make a strong style statement. Mixing Textures Another exciting trend is mixing different textures within a single design. Combining 3D puff embroidery with other embroidery techniques, such as flat stitching or appliqué, creates a rich, multi-dimensional effect. This approach adds depth and interest to the design, making it more visually appealing. To achieve this, you can use various types of threads and materials. For example, combining matte and metallic threads can create a unique contrast, while using different fabric types for appliqué can add an extra layer of texture. Personalized and Custom Designs Personalization continues to be a significant trend in embroidery, and 3D puff embroidery is no exception. Customers love the ability to create custom designs that reflect their personality, interests, or brand identity. This trend is particularly prominent in products like caps, bags, and jackets, where personalized initials, names, or logos are popular. For businesses like Punch Digitizing, offering personalized 3D puff embroidery services can be a great way to attract clients looking for unique and custom designs. Ensure you have a process in place to accommodate personalized orders efficiently. Eco-Friendly Materials As sustainability becomes increasingly important, the use of eco-friendly materials in 3D puff embroidery is on the rise. Designers are opting for organic and recycled threads, biodegradable foams, and natural fabrics to reduce their environmental impact. This trend not only appeals to environmentally conscious consumers but also contributes to a more sustainable industry overall. Incorporating eco-friendly materials into your projects can set your work apart and attract a broader audience. Highlighting your commitment to sustainability can also enhance your brand’s reputation. Minimalist Designs While bold and vibrant colors are trending, minimalist designs are also gaining traction. Clean, simple designs with minimal detailing can create a sophisticated and modern look. This trend is perfect for those who prefer understated elegance over intricate patterns. To achieve a minimalist look, focus on clean lines, geometric shapes, and a limited color palette. This approach works well for corporate branding and fashion items that require a sleek and professional appearance. Pop Culture and Nostalgia Pop culture and nostalgia are powerful influences in design trends, and 3D puff embroidery is no exception. Designs inspired by popular movies, TV shows, music, and retro styles are highly sought after. These designs resonate with consumers on a personal level, often evoking fond memories and emotions. Incorporating pop culture references into your embroidery projects can be a fun and engaging way to attract a younger audience. Ensure you have the necessary permissions and licenses when using copyrighted material. Digital Influence The digital age continues to shape trends in all areas of design, including embroidery. With the rise of social media, there’s a growing demand for designs that look great both in person and on digital platforms. High-contrast, bold designs that photograph well are particularly popular. Consider how your 3D puff embroidery designs will appear in photos and videos. Ensuring your work is visually striking in digital formats can help you gain traction on platforms like Instagram and Pinterest. Technological Advancements Advancements in embroidery technology are continually pushing the boundaries of what’s possible with 3D puff embroidery. New embroidery machines and software offer enhanced precision, more design options, and greater efficiency. Keeping up with these technological trends can help you stay competitive and deliver high-quality results. Investing in the latest equipment and software can improve your workflow and expand your creative possibilities. Regularly updating your skills through training and workshops can also help you make the most of these advancements. Conclusion Staying updated with the latest trends in 3D puff embroidery can inspire your projects and keep your designs relevant. Whether you’re experimenting with bold colors, mixing textures, or embracing eco-friendly materials, incorporating these trends can elevate your work. As the industry evolves, embracing new ideas and technologies will help you stay ahead and continue to create stunning, innovative designs.

Trends in 3D Puff Embroidery – New 3D Embroidery Ideas Read More »

Sustainability in digitizing service

Embracing Sustainability in 3D Puff Embroidery

In recent years, sustainability has become a buzzword across various industries, including embroidery. As the demand for eco-friendly practices grows, it’s essential to explore how we can incorporate sustainability into our 3D puff embroidery digitizing projects. By making mindful choices, we can reduce our environmental impact while still creating stunning, dimensional designs for 3d embroidery. Understanding Sustainability in Embroidery Sustainability in embroidery involves using materials and methods that minimize harm to the environment. This includes choosing eco-friendly materials, reducing waste, and employing energy-efficient practices. As an embroiderer, whether you’re a hobbyist or a professional offering digitizing services like Punch Digitizing, adopting sustainable practices can benefit both your business and the planet. Choosing Eco-Friendly Materials One of the most effective ways to enhance sustainability in 3D puff embroidery is by selecting eco-friendly materials. Here are some options to consider: Organic Threads: Options for threads made from organic cotton or other natural fibers. These threads are grown without harmful pesticides and chemicals, reducing their environmental footprint. Recycled Threads: Another great option is threads made from recycled materials. These threads give a second life to plastic bottles and other waste products, helping to reduce landfill waste. Sustainable Foam: Traditional embroidery foam can be harmful to the environment due to its non-biodegradable nature. Look for foam made from biodegradable or recycled materials to lessen your impact. Natural Fabrics: Using natural fabrics such as organic cotton, linen, or hemp can also contribute to sustainability. These materials are typically more environmentally friendly than synthetic alternatives. Reducing Waste Waste reduction is a key aspect of sustainable embroidery. By implementing the following practices, you can minimize waste in your 3D puff embroidery projects: Efficient Design: Plan your designs carefully to reduce excess material usage. This includes optimizing the placement and size of your embroidery to minimize waste. Reuse and Recycle: Save leftover materials from previous projects for future use. Small pieces of fabric and thread can often be repurposed in new designs. Digital Designs: Utilize digital design tools to perfect your embroidery patterns before stitching. This helps reduce the need for trial and error, conserving materials. Proper Hooping: Ensure your fabric and foam are properly hooped to avoid misalignment and waste. Secure hooping prevents the need for rework and material loss. Energy-Efficient Practices Adopting energy-efficient practices in your embroidery studio can further enhance sustainability. Here are some tips to consider: Energy-Efficient Machines: Invest in embroidery machines that are energy-efficient. These machines consume less power, reducing your overall energy usage. LED Lighting: Replace traditional bulbs with LED lighting in your workspace. LEDs use less energy and have a longer lifespan, making them a more sustainable choice. Mindful Usage: Be conscious of your energy consumption. Turn off machines and lights when not in use, and schedule embroidery sessions during off-peak energy hours if possible. Sustainable Packaging If you offer embroidery services, consider using sustainable packaging for your products. This includes using recyclable or biodegradable materials for shipping and packaging. Additionally, minimizing packaging materials can further reduce waste. Educating Customers Part of embracing sustainability involves educating your customers about your eco-friendly practices. Highlighting your commitment to sustainability can attract environmentally conscious clients and set you apart from competitors. Be transparent about the materials you use and the steps you take to minimize your environmental impact. Staying Informed and Adapting The field of sustainable embroidery is constantly evolving, with new materials and practices emerging regularly. Stay informed about the latest developments by joining industry forums, attending workshops, and subscribing to relevant publications. By staying updated, you can continuously improve your sustainability efforts. Conclusion Incorporating sustainability into your 3D puff embroidery projects is not only beneficial for the environment but can also enhance the appeal of your work. By choosing punch digitizing with eco-friendly materials, reducing waste, adopting energy-efficient practices, and educating your customers, you can make a positive impact. As the world moves towards more sustainable practices, embracing these changes in your embroidery projects can help you stay ahead and create beautiful, environmentally conscious designs.

Embracing Sustainability in 3D Puff Embroidery Read More »

3d puff designs creation

Mastering the Art of 3D Puff Embroidery Design Creation

Creating 3D puff embroidery designs can be incredibly rewarding, allowing you to add texture and dimension to your embroidery projects. Whether you’re a seasoned professional or just starting out, understanding the intricacies of design creation can help you achieve spectacular results. In this guide, we’ll explore practical steps and tips to help you master the art of 3D puff embroidery design creation. Understanding the Basics Before diving into the design process, it’s essential to grasp the basics of 3D puff embroidery. This technique involves using a foam underlay to raise parts of the design, giving it a three-dimensional look. The foam is placed under the fabric and stitched over, creating the “puff” effect. Choosing the Right Foam The type of foam you use is crucial to the outcome of your design. There are various thicknesses and colors available, each suited to different projects. Thickness: Thicker foam creates a more pronounced puff but can be harder to work with. For detailed designs, a thinner foam might be more appropriate. Color: The color choices of  3d puff embroidery on foam can affect the final appearance, especially if your stitching doesn’t cover it completely. White foam is a safe choice for most projects, but colored foam can be used for specific effects. Designing with Purpose When creating a design, think about the purpose and the final product. Are you making a logo, a piece of clothing, or a decorative item? The design should suit its intended use. Logos and Branding: For company logos, like those for Punch Digitizing, it’s crucial to maintain brand integrity. Simplify complex logos to ensure they look clean and professional in 3D puff form. Clothing and Accessories: For apparel, consider the placement of the design. Designs on hats, for instance, need to be smaller and centered, while designs on jackets can be larger and more spread out. Tips for Creating Effective Designs Keep it Simple: Intricate designs can get lost in the puff effect. Simplify your artwork to ensure the key elements stand out. Outline and Details: Use bold outlines to define the edges of your design. This helps maintain clarity and enhances the three-dimensional effect. Spacing and Overlap: Ensure your design elements are appropriately spaced. Overlapping too much can flatten the puff, while too much space can make the design look disjointed. Using Software for Design Embroidery software is an invaluable tool for creating 3D puff designs. Programs like Wilcom and Hatch offer features specifically for 3D embroidery. Digitizing: Start by digitizing your design, converting it into a format your embroidery machine can read. This step is crucial for precise and accurate stitching. Layering: Use the software to create multiple layers in your design. This helps manage the stitching sequence, ensuring that the foam is properly covered. Simulation: Most software includes a simulation feature, allowing you to preview your design in 3D. This helps you visualize the final product and make necessary adjustments. Practical Steps for Embroidery Once your design is ready, it’s time to bring it to life. Here’s a step-by-step guide to help you through the process: Prepare Your Materials: Gather your fabric, foam, and threads. Ensure your embroidery machine is set up and ready to go. Hooping: Proper hooping is essential for a successful 3D puff design. Ensure the fabric and foam are tightly secured to avoid shifting during stitching. Stitching: Start with a base layer of stitching to secure the foam. Follow your digitized design, stitching over the foam to create the puff effect. Finishing Touches: Once the stitching is complete, carefully trim any excess foam. Use a heat gun or iron to smooth out the edges if necessary. Creating beautiful 3D puff designs involves more than just the right techniques. Color choices play a significant role in the overall appeal of your designs. To get more insights into selecting the perfect colors, check out our article on 3D puff embroidery color choices Staying updated with the latest trends can also inspire your design process. Learn about the current trends in 3D puff embroidery  to keep your designs fresh and relevant. If you’re conscious about the environmental impact of your projects, consider reading about 3D puff embroidery sustainability  to discover eco-friendly practices and materials. Conclusion Punch Digitizing, We are Master in 3D puff embroidery design creation takes practice and attention to detail. By understanding the basics, using the right materials, and leveraging embroidery software, you can create stunning, dimensional designs that stand out. Whether you’re working on branding, clothing, or decorative items, these tips will help you achieve professional results. Remember, the key to great 3D puff embroidery is a combination of creativity and technique. Keep experimenting, stay patient, and most importantly, enjoy the process of bringing your designs to life!

Mastering the Art of 3D Puff Embroidery Design Creation Read More »

Puff embroided shirts

Transform Your Designs with Perfect Color Choices for 3D Puff Embroidery

3D puff embroidery is an eye-catching way to add dimension and style to your projects, making color selection a critical aspect of creating standout designs. Whether you’re a professional or a hobbyist, understanding how to choose the right colors can elevate your work to new heights. In this blog, we’ll dive deep into the nuances of color choices for 3D puff embroidery, offering tips and tricks to help you make the best decisions. Understanding Color Theory in 3D Puff Embroidery Color theory is fundamental when it comes to any form of design, and 3D puff embroidery is no exception. By grasping the basics of color theory, you can create harmonious and visually appealing designs. Primary colors (red, blue, and yellow) are the building blocks, while secondary colors (green, orange, and purple) result from mixing primary colors. Complementary colors, like blue and orange or red and green, are opposite each other on the color wheel and create high contrast when used together. Incorporating these principles can help ensure that your designs pop. For instance, using complementary colors in 3D puff embroidery can enhance the dimensional effect, making the design more vibrant and noticeable. Choosing Colors Based on Design Purpose When selecting colors for your 3D puff embroidery project, consider the purpose of the design. Are you creating a business logo, a piece of art, or a functional item like a hat or jacket? The context can significantly influence your color choices. Logos and Branding: If you’re working on a logo, consistency with the brand’s color scheme is vital. Brands often have specific color palettes that convey their identity. For example, Punch Digitizing offers digitizing services, so if you’re embroidering their logo, staying true to their brand colors maintains their visual identity. Artistic Projects: For more creative and artistic projects, you have the freedom to experiment. Consider using bold and contrasting colors to make the 3D effect more pronounced. Functional Items: When working on functional items like clothing or accessories, think about the overall aesthetic. Neutral colors might be suitable for a more subtle look, while bright colors can make a statement. Tips for Selecting the Right Colors Test Swatches: Before committing to a color scheme, create test swatches. This allows you to see how the colors interact and appear in 3D puff embroidery. Consider the Fabric: The color of the fabric you’re working with will impact your color choices. Dark fabrics often require brighter colors to stand out, while light fabrics can accommodate a wider range of hues. Use a Color Palette Tool: Tools like Adobe Color can help you create cohesive color palettes. These tools allow you to explore different color combinations and find what works best for your design. Seasonal Trends: Keep an eye on seasonal color trends. Colors that are popular in fashion and design can inspire your 3D puff embroidery projects. For instance, pastels might be in vogue during spring, while richer, deeper colors are popular in fall. When discussing color choices, it’s essential to consider the broader context of your 3D puff embroidery projects. For example, the colors you choose can directly impact the overall design process. If you’re interested in learning more about how to create intricate designs, check out our detailed guide on 3D puff embroidery design creation Moreover, staying updated with the latest trends can help you make informed decisions about your color choices. Discover the latest trends in 3D puff embroidery  to ensure your designs are fresh and contemporary. Lastly, sustainability is becoming increasingly important in all forms of design, including embroidery. Explore our article on 3D puff embroidery sustainability  to learn how you can make eco-friendly choices in your projects. Conclusion Choosing the right colors for your 3D puff embroidery projects is both an art and a science. Punch Digitizing helps you in understanding color theory, considering the purpose of your design, and following practical tips, you can create stunning and impactful designs. Whether you’re working on a professional logo or a personal project, the right colors can make all the difference. Remember, the world of 3D puff embroidery is vast and full of possibilities. Keep experimenting, stay curious, and most importantly, have fun with your designs!

Transform Your Designs with Perfect Color Choices for 3D Puff Embroidery Read More »

Embroidered wardrobe

Embroidery Digitizing for Fashion: Transform Your Wardrobe with Punch Digitizing

Fashion is all about expressing individuality, and nothing does it better than custom embroidery. With the expertise of Punch Digitizing, you can elevate your fashion game by adding unique, personalized embroidery to your clothing and accessories. Let’s explore how embroidery digitizing is transforming the fashion industry and how you can leverage our services to stand out. The Impact of Embroidery Digitizing in Fashion Embroidery digitizing is the process of converting a design into a digital file that guides embroidery machines. This technique allows for precise and intricate embroidery on a variety of fabrics, making it a popular choice in the fashion industry. From haute couture to everyday wear, embroidery digitizing adds a touch of elegance and uniqueness to any piece. Customizing Your Wardrobe With embroidery digitizing, the possibilities for customization are endless. Whether you want to add a monogram to a shirt, create intricate patterns on a dress, or embellish a handbag, digitizing allows you to bring your creative ideas to life. At Punch Digitizing, we specialize in creating detailed and high-quality custom embroidery digitizing, ensuring that your fashion items are both stylish and durable. Elevating Fashion Designs Custom embroidery digitizing can elevate even the simplest of designs. For instance, a plain denim jacket can be transformed into a statement piece with the addition of floral embroidery on the back or sleeves. Similarly, a basic t-shirt can become a fashion-forward item with a unique embroidered logo or graphic. Consider using embroidery to enhance your brand’s identity. If you run a fashion line, custom embroidery can set your pieces apart from the competition. A well-placed embroidered logo can add a professional touch to your products and increase brand recognition. Benefits of Embroidery Digitizing in Fashion Precision and Detail: Embroidery digitizing allows for intricate and detailed designs that are difficult to achieve with traditional embroidery methods. This precision ensures that your designs are consistent and high-quality. Durability: Embroidered designs are more durable than printed ones. The threads used in embroidery are resistant to fading and wear, ensuring that your designs remain vibrant and intact even after multiple washes. Versatility: Embroidery can be applied to a wide range of fabrics and materials, from cotton and denim to leather and silk. This versatility makes it suitable for various fashion items, including clothing, accessories, and footwear. Personalization: Custom embroidery adds a personal touch to your fashion items. Whether it’s a monogram, a favorite quote, or a unique design, embroidery allows you to express your individuality through your wardrobe. Applications of Embroidery Digitizing in Fashion Here are some popular ways to incorporate digitized embroidery into your fashion items: Clothing: Add embroidered designs to shirts, jackets, dresses, and jeans. Custom embroidery can make your clothing items unique and stylish. Accessories: Embellish hats, bags, scarves, and shoes with embroidery. These personalized accessories can enhance your overall look. Uniforms: Custom embroidery is perfect for creating professional and cohesive uniforms for businesses, schools, and sports teams. Embroidered logos and names can add a polished touch to any uniform. Bridal and Formal Wear: Add elegant embroidery to bridal gowns, bridesmaid dresses, and formal wear. Intricate lace patterns, floral designs, and monograms can make these special occasion outfits even more memorable. The Punch Digitizing Difference At Punch Digitizing, we are committed to delivering top-notch digitizing services tailored to your fashion needs. Our team of experts uses advanced software and equipment to create precise and high-quality embroidery digitizing. We understand the importance of attention to detail and work closely with our clients to ensure their vision is realized. Our services are designed to meet the needs of fashion designers, clothing brands, and individual customers in the USA. With quick turnaround times and excellent customer support, we make the process of custom embroidery digitizing seamless and hassle-free. Conclusion Embroidery digitizing is revolutionizing the fashion industry by allowing for precise, detailed, and durable custom designs. At Punch Digitizing, we offer exceptional digitizing services that can transform your fashion items and set you apart from the competition. Whether you’re looking to add a personal touch to your wardrobe or enhance your brand’s identity, our custom embroidery digitizing services are the perfect solution. Explore the potential of custom embroidery digitizing for your fashion needs and discover how Punch Digitizing can help you create stunning, personalized designs. From clothing and accessories to uniforms and formal wear, the possibilities are endless. Contact Us for more information.

Embroidery Digitizing for Fashion: Transform Your Wardrobe with Punch Digitizing Read More »