blog

Best Embroidery Digitizing Services in Florida | Punch Digitizing

Best Embroidery Digitizing Services in Florida

Punch Digitizing is now offering its digitizing Services in Florida. In Florida, we also provide vectorization services. Punch Digitizing has been providing its services across the globe for over a decade. Our experts are capable of digitize it with perfection and ease, no matter how intricate your design is. All of your requirements for digitizing will be met by our expert digitizers. In the vectorization  and embroidery digitizing industry, we are the leading suppliers of high-quality services. Our goal is to have the quickest turnaround with outstanding customer support. Our experts also advise our clients at each step of the way. When it comes to having artwork on various clothing such as  Caps, T-Shirts, Hats, Bags, Coats, Scrubs, Aprons, Bennies, etc., Custom Embroidery Digitizing is the most significant elements in the products promotional industry. We have the expertise to carve out complex designs for any fabric or positioning. PunchDigitizing team can turn any logo into a digital embroidery design. We not only provide a logo digitizing service, we also provide our customers hats embroidery digitizing, 3d puff digitizing and t-shirt embroidery digitizing services in Florida. If you have any orders, do not hesitate to inform us. To deliver order on time, we will do our very best. Our goal is to provide quality services to our clients. Why choose us At Punch digitizing, we work to provide our honored customers only quality and satisfying work. Our professional digitizers work to guarantee your satisfaction and provide you with the best digitizing work for embroidery, which will give you a tremendous sew-out result for embroidery. Our excellent digitizing work will ensure that you get the desired result of embroidery. It’s all we offer is the best cheapest and unmatched cost guaranteed in the entire digitizing industry online.

Best Embroidery Digitizing Services in Florida Read More »

What is Vector Art? | History of Vector Art | PunchDigitizing

What is a Vector Art?

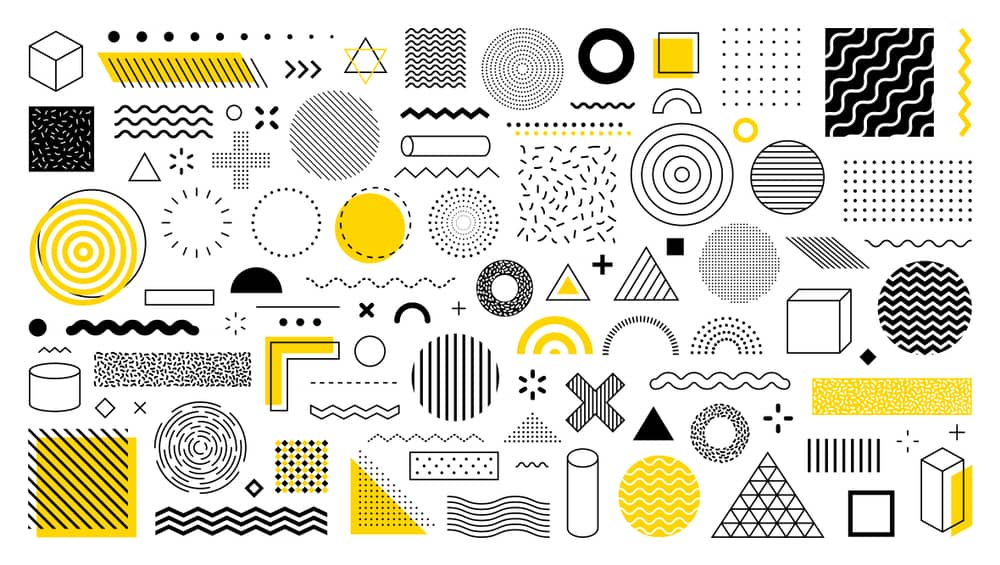
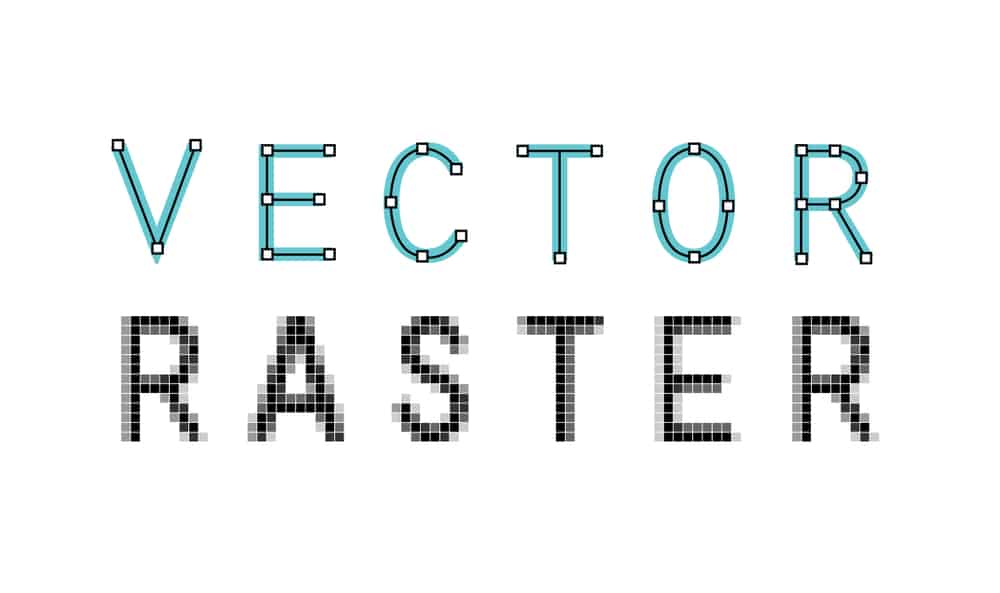
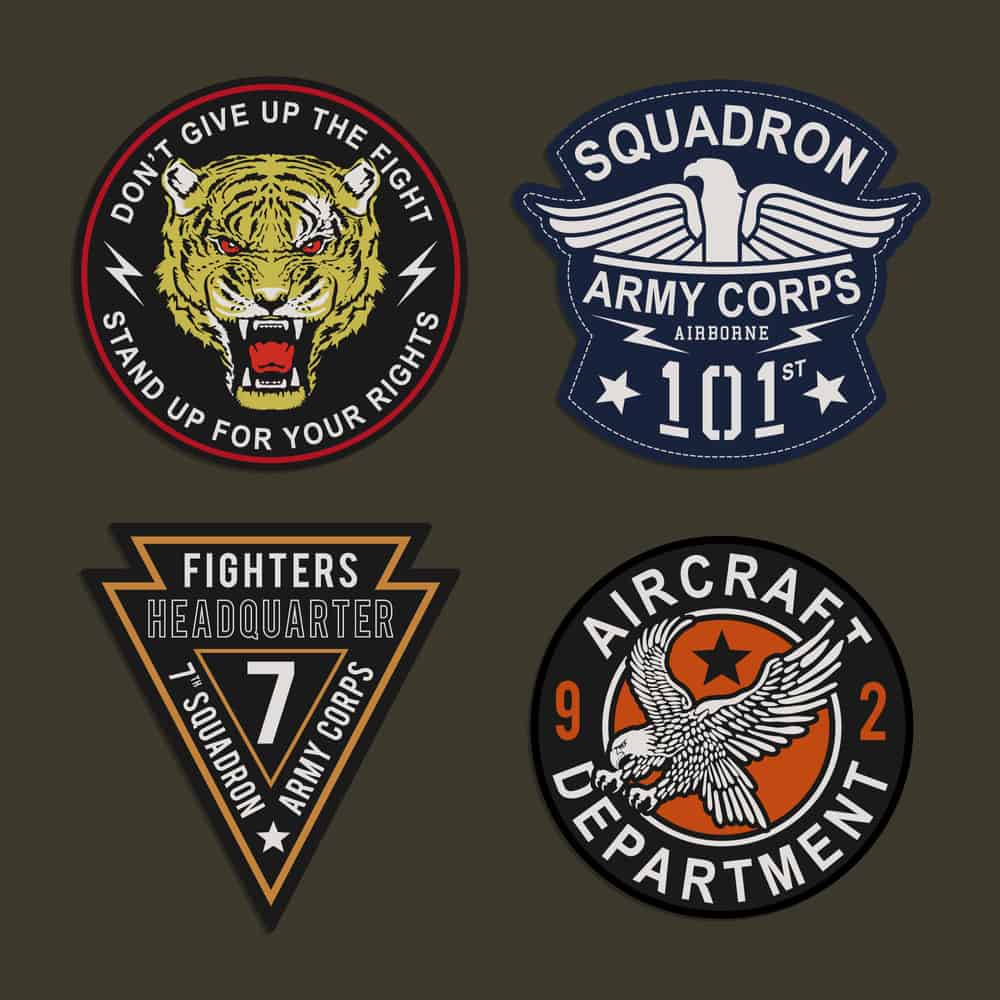
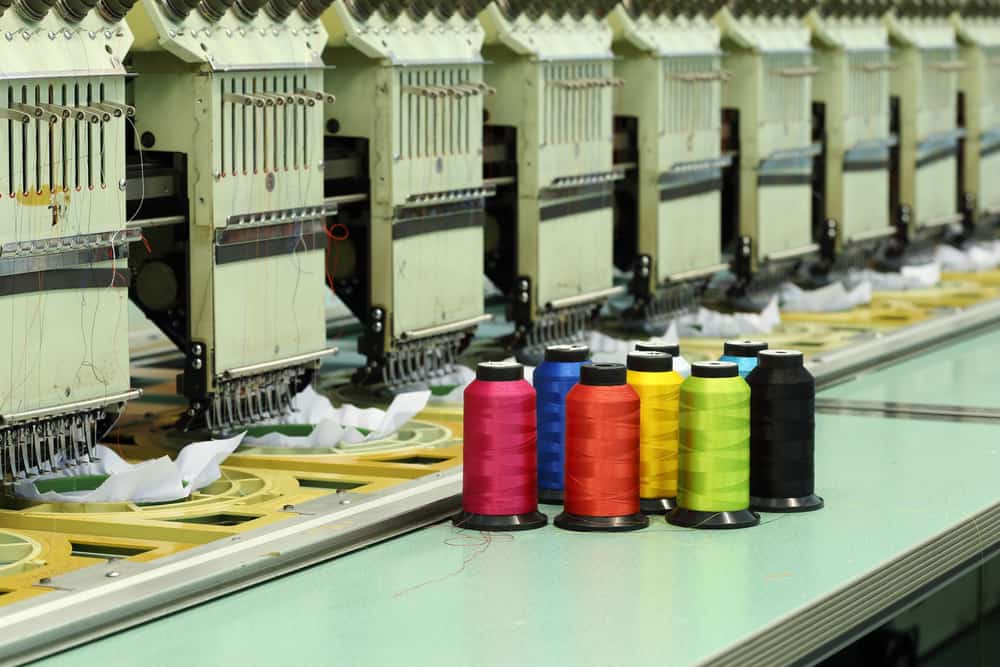
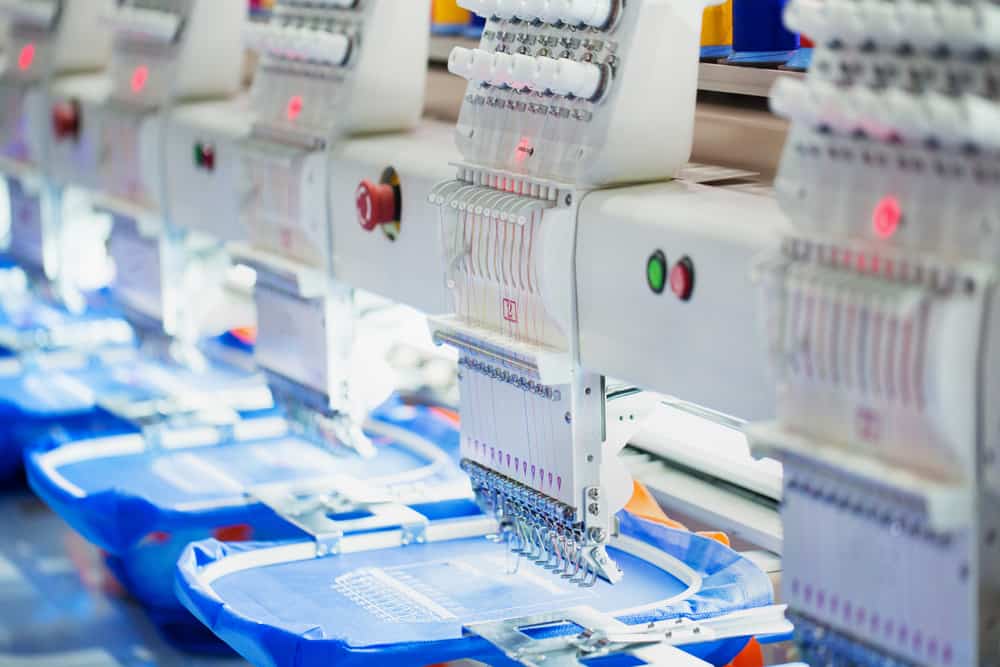
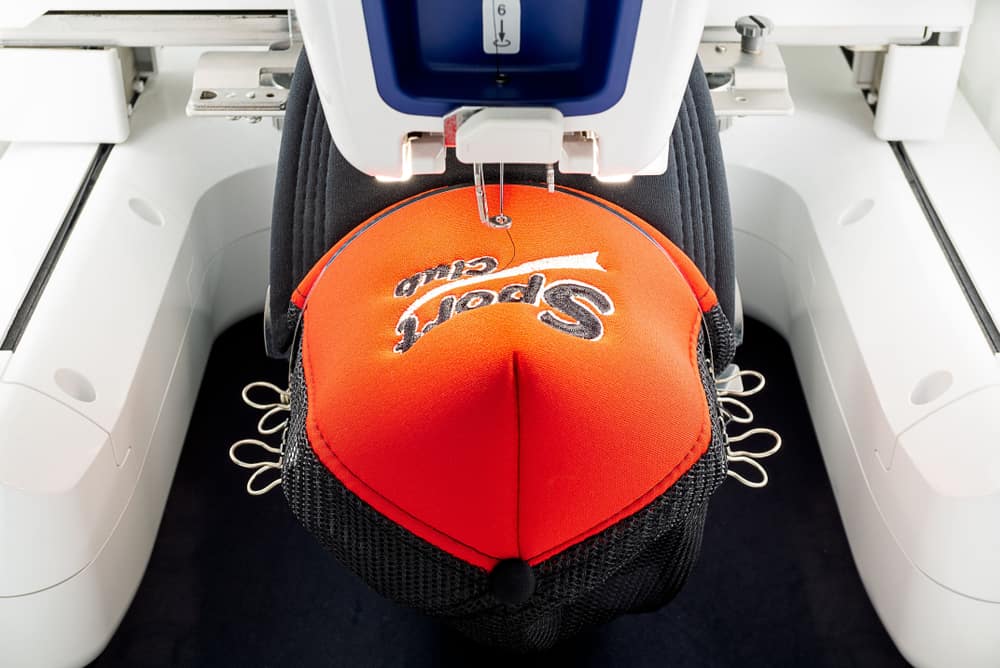
In the world of digital design, the term “vector art” frequently arises, especially for those involved in graphic design and embroidery digitizing. But what exactly is vector art, and why is it so important in the design industry? In this blog, Punch Digitizing will dive deep into the concept, uses, and advantages of vector art, helping you understand its pivotal role in high-quality digital and printed designs. Understanding What is Vector Art So, what is vector art? In simple terms, vector art services refers to a type of digital artwork that is created using mathematical equations. These mathematical formulas define shapes, lines, curves, and colors, allowing the image to be scaled infinitely without losing quality. This difference of raster images (like JPEGs or PNGs), which are made up of pixels and can become blurry or distorted when resized. The beauty of vector art lies in its scalability. Since it’s not based on a fixed number of pixels, you can zoom in or enlarge the artwork to any size, from a small business card to a massive billboard, without any loss of detail or clarity. How Does Vector Art Work? Vector art is created using specialized graphic design software such as Adobe Illustrator, CorelDRAW, or Inkscape. These programs allow designers to build images out of vectors, which are composed of paths. Each path is made up of a start point and an endpoint, connected by lines and curves, which are governed by mathematical equations. The result is a clean, precise image that can be easily edited and manipulated. For example, if you’re designing a company logo in a vector format, you can adjust its size, color, and shape without worrying about pixelation or the loss of image quality. This is particularly useful for businesses that need their logos to be used on various media, from print to web to embroidery. Why is Vector Art Essential for Digitizing Services? As a digitizing services provider like Punch Digitizing, we often work with clients who need their artwork converted into formats suitable for embroidery machines. In this process, vector art plays a crucial role. When converting designs into embroidery formats, clean lines and sharp details are essential for accurate stitching. Since vector art maintains these qualities at any size, it becomes the perfect starting point for the embroidery digitizing process. Without vector images, resizing or manipulating a design can result in loss of detail, jagged edges, and a generally poor-quality final product. By starting with a vector file, we ensure that the embroidery remains sharp and true to the original design, regardless of the size or complexity of the pattern. Common Uses of Vector Art Vector art is widely used in many fields beyond digitizing for embroidery, making it a versatile tool for numerous industries. Here are some common applications: Logo Design Logos need to be highly scalable since they are used across various media. With vector art, a logo can be resized from a business card to a billboard without losing quality. Promotional Materials Flyers, posters, and brochures often require high-resolution graphics. Vector art ensures that these designs can be printed in large formats without any loss of clarity or sharpness. Clothing and Apparel Design Many clothing companies use vector designs for screen printing, embroidery, and other processes. The precision and scalability of vector art make it ideal for transferring designs onto fabric. Web Graphics While websites primarily use raster images, vector art is often employed in the creation of logos, icons, and infographics because it allows for clear, crisp visuals that load quickly and look good on any screen size. Advantages of Using Vector Art Now that you know what vector art is, let’s explore its key advantages: Infinite Scalability One of the most significant benefits of vector art is that it can be scaled to any size without losing quality. Whether it’s shrinking down for a tiny graphic on a website or enlarging it for a large format print, vector images maintain their clarity and detail. Editable Unlike raster images, vector art can be easily edited. You can move, adjust, and change each element of the design without affecting the overall image quality. This flexibility is particularly beneficial for businesses that require regular updates to their designs. Smaller File Size Even though vector files can represent complex images, they typically have smaller file sizes compared to high-resolution raster files. This makes them easier to store, transfer, and upload, without sacrificing quality. Precision Vector art provides precise control over shapes, lines, and colors, making it perfect for detailed designs. This is especially useful in technical drawings, logos, and illustrations where exact dimensions and shapes are crucial. Common Formats of Vector Art When working with vector art, you’ll encounter various file formats. Some of the most common ones include: AI (Adobe Illustrator): A proprietary format used by Adobe Illustrator, which is widely recognized in the design industry. EPS (Encapsulated PostScript): A versatile format used by many design programs, ideal for exporting vector graphics. SVG (Scalable Vector Graphics): A web-friendly format that allows vector images to be displayed on websites without losing quality. PDF (Portable Document Format): While primarily known as a document format, PDFs can also contain vector graphics and are widely used for printing. Conclusion In conclusion, vector art is an invaluable asset in the design world. From logos to promotional materials, its infinite scalability, precision, and ease of editing make it the go-to format for high-quality designs. For businesses like Punch Digitizing, working with vector art ensures that embroidery designs are clean, crisp, and ready for production. Contact Punch Digitizing for professional vector art services. Understanding the importance of vector art and how it fits into digitizing services is essential for creating lasting, high-quality designs. So, the next time you’re considering a logo or graphic design, be sure to ask for it in a vector format—your future self (and embroidery provider) will thank you!

What is a Vector Art? Read More »

difference between raster and vector graphics

What is The Difference Between Raster and Vector Graphics

The main types of online digital graphic images are vector and raster. Very often, people ask what is the differences between raster and vector graphics? We fail to tell them apart and determine which kind is ideal for their projects. An array of pixels of different colors that together form an image is a raster graphic, such as a gif or jpeg. A vector graphic, such as a .eps file or an Adobe Illustrator file, consists of either straight or curved paths, or lines. Let’s Punch Digitizing guide you everything you should know about the difference between raster and vector graphics. Raster graphics Raster graphics are made up of a collection of individual pixels. Each pixel reflects a color, but when they are all combined, they form a well-detailed image. It is possible to equate Raster images with pointillistic paintings that are composed of individual dots forming an entire painted image. Raster images are known as bitmaps as well. One of the biggest benefits of raster images is that it enables editing pixel-by-pixel so that raster images can be used to design very detailed images. In pictures, raster graphics are best used when the smooth transition between shades and colors needs to be illustrated. For catalogs, posters, postcards, stationery, and other daily projects, Raster graphics are outstanding. Even though they tend to look the same, Raster images take up more hard disc space than vector format images. That’s because raster files contain details in the graphic about each pixel. This problem can be mitigated by compression techniques, although these graphics can present you with a challenge if space is a major concern. .bmp, .gif, .jpeg, .jpg, .png, .psd, and .tif are the standard raster graphics file formats. Advantages of raster graphics include: They are quick to use. They include subtle color gradations. Using popular programs such as Photoshop and Microsoft Paint, they are easy to edit. The main drawback of raster graphics is that they are not always accessible for creating high-quality printed projects when the desired end result is large-format. Vector graphics Unlike raster graphics that are composed of pixels that come together and form an image, Vector graphics are composed of paths based on mathematical formulas, hence the name Vector. If you look closely at a vector graphic, just like a child’s connecting the dots game you can see control points with curves between them. Vector graphics are scalable, because the vectors are mathematically defined, and can be blown up to any size without losing any quality or having any of the blurry, pixelated features you see when you zoom in on raster images. For this purpose, vector graphics are suitable for logos and other projects with multiple sizes that need to stay sharp. Complementing vector trace designs that carry simple and solid colors. Moreover, in terms of imitating photos, they are the best option. Although vector images provide some degree of image detail, compared with raster images, they lag behind in terms of intricate detail. The main explanation for this is that vector images consist of shapes and all of them have their own color, so in vector images, it is comparatively more difficult to render images of complex color gradients and shadows than in raster images. Programs like CorelDraw, Illustrator and InkSpace can be used to create and design vector images. Conclusion: Raster images are suitable for simple images, such as photos that express subtle gradations of color, shadow, and light, despite their lack of consistency at larger scales and often unwieldy file sizes. Vector graphics are suitable for scalable projects with fewer colors, despite their inability to make completely seamless color transitions. To cover all of your bases, have your template in all formats or in vector form to be converted later on.

What is The Difference Between Raster and Vector Graphics Read More »

Benefits of Using Custom Embroidery Patches in USA | PunchDigitizing

Benefits of Using Custom Embroidery Patches

Custom embroidered patches can prove beneficial as a branding solution for an organization when used effectively. This branding medium is very flexible and can help a company stand out and appear more sophisticated and developed. It is possible to attach these custom embroidery patches either with a pin or sewn on. One of the most modern attachment methods is Iron-on backing. The Iron-on backing is the latest solution that is mostly chosen for its simplicity over the other techniques. Not only are these custom logo embroidery patches used in clothing and apparel, but they are also often used as a hat in the application of other items. They are used to draw consumers by giving them a distinctive identity and brand representation for their products so that customers can know who is behind the accomplishment if there is a credit to be awarded for the high-quality product. Here are some benefits of using patches that are custom made: Benefits of Using Custom Embroidery Patches: 1. Cost: Instead of this sort of embroidered patches, you will possibly spend even more on the cost of additional raw material if you use conventional methods. Stitching it on the fabric will also increase the production cost of the product you are producing. This leaves a lower margin for investment gains. You want to make sure that you get high-quality, low-effort, and quick work with minimal expenditure in due time. For those who are trying to run their company under a budget, custom embroidered patches are the best. 2. Professional Look: Custom patches that are embroidered can make uniforms look bolder, refined and professional. They provide personal interaction and also help a lot to build relationships with customers. 3. Company Distinguishes: Custom logo embroidery patches are something searched for by every growing organization searching for better brand representation. If a customer enjoys your product, then you want to let them know that it is your product. This will give your product more exposure and get you more consumers who are looking to purchase your product or buy from your company. These small strategies will help you differentiate the brand from your product and allow it to stand out in the crowd. 4. Multiple Types and Sizes The best thing about these patches is that a variety of styles, shapes and sizes are available. Shirts, sweatshirts, coats, caps or any other type of clothing can be easily added to them. You may also remove them at any time without removing them and allowing the garment to be reused. 5. Sustainable: The last thing your customers would want is to have the logos or patches come off in their working atmosphere when they are doing heavy-duty work, whether in a hospital or a corporate office. The embroidered patch will not come off or become dull, no matter how many times you wash your clothing. 6. Advertising: Any clothing material with a custom patch will provide you with a promotional walking billboard almost instantly while also providing a free advertising mode, making it a very smart and worthwhile investment.

Benefits of Using Custom Embroidery Patches Read More »

What is Applique Embroidery | Applique Embroidery Trends

Things to Know About Applique Embroidery

Appliqué embroidery is a timeless technique that adds texture, dimension, and color to any project. Whether you’re looking to personalize clothing, create unique home décor, or add flair to accessories, appliqué offers endless creative possibilities. But what exactly is appliqué embroidery, and how can you keep up with the latest trends? At Punch Digitizing, we bring your embroidery visions to life, including custom appliqué designs that stand out. Let’s dive into what appliqué embroidery is, how it works, and the latest trends you can incorporate into your projects. What is Appliqué Embroidery? Appliqué embroidery involves sewing a piece of fabric onto a larger fabric surface to create a design. Instead of stitching a design entirely with thread, appliqué uses fabric pieces to build shapes, colors, and textures, which are then stitched around the edges to secure them. This technique allows you to add bold patterns, multiple colors, and texture to your embroidery without the need for heavy stitching. In essence, appliqué is like fabric collage: you cut shapes from one fabric and apply them to another, stitching them in place with decorative stitches like satin stitch, blanket stitch, or even zigzag stitch. How Does Appliqué Embroidery Work? Here’s a simple breakdown of the appliqué embroidery process: Step 1: Choose Your Design and Fabrics Start by selecting the fabric for the base (the background fabric) and the fabric pieces you want to appliqué. Your appliqué fabric should complement the base and the overall design of your project. Base fabric: This is the fabric where your appliqué will be placed. Choose something sturdy enough to handle the stitching and the additional fabric layers. Appliqué fabric: These are the pieces you will cut out and attach to your base fabric. You can use any type of fabric, from cotton to felt, depending on the effect you want to create. Step 2: Prepare the Appliqué Pieces Once you’ve selected your fabrics, trace or cut out the shapes you want to appliqué. These shapes can range from simple circles or hearts to more intricate designs, such as letters, flowers, or animals. Use fusible web (a double-sided adhesive) to hold the fabric pieces in place before stitching. This temporary hold makes it easier to position the appliqué exactly where you want it and keeps the fabric from shifting during stitching. Step 3: Secure with Stitches After you’ve placed the appliqué pieces on your base fabric, it’s time to stitch around the edges to secure them. The most common embroidery stitch for appliqué is the satin stitch, which is a dense, closely spaced stitch that creates a neat border around the edges of the fabric pieces. Other options include: Blanket stitch: A decorative, looped stitch that adds texture around the edges. Zigzag stitch: A simple, clean stitch that provides a secure hold. Appliqué Embroidery vs. Traditional Embroidery The biggest difference between appliqué and traditional embroidery is that appliqué uses fabric pieces to create designs, whereas traditional embroidery relies solely on thread. Appliqué is often faster than traditional embroidery because you don’t need to fill large areas with dense stitches—fabric pieces do most of the work. It’s also a great way to add texture and layers to your projects without adding too much bulk. Popular Appliqué Embroidery Techniques There are several types of appliqué embroidery techniques you can explore: Raw edge appliqué: Leaves the edges of the appliqué fabric raw, allowing them to fray slightly for a more rustic or textured look. Turned edge appliqué: Involves folding the edges of the appliqué fabric under before stitching for a clean, finished look. Reverse appliqué: Instead of layering fabric on top, this technique involves cutting away sections of the top fabric to reveal another fabric underneath, creating a layered design effect. Appliqué Embroidery Trends to Watch Appliqué embroidery is experiencing a resurgence in the fashion and décor world, and these are some of the trends shaping this creative technique: 1. Layered Fabric Effects One of the biggest trends in appliqué is creating multi-layered designs that add depth and complexity to the fabric. This involves layering different fabrics, textures, and colors to achieve a 3D effect. Using contrasting textures—like mixing cotton with velvet or denim with lace—creates a striking visual impact. 2. Mixed Media Appliqué Modern appliqué designs are embracing mixed media, combining traditional fabric with elements like sequins, beads, and embroidery to create eye-catching designs. This trend allows for more creativity, blending appliqué with hand or machine embroidery to add dimension and shine. 3. Bold and Geometric Patterns Bold shapes and geometric patterns are trending in appliqué embroidery. Large, oversized shapes like triangles, squares, and circles, or intricate geometric patterns, bring a modern edge to both fashion and home décor. Using bold colors in these designs makes them pop against a neutral background. 4. Custom Monograms and Lettering Personalized appliqué, especially in the form of monograms or lettering, is a popular trend for clothing, accessories, and home décor items. Whether you’re stitching initials onto a bag or creating a decorative lettered pillow, custom appliqué designs add a personalized touch. 5. Nature-Inspired Designs Floral and nature-inspired appliqué designs never go out of style, but recent trends focus on larger-than-life florals and botanical elements. Large appliqué leaves, flowers, and animal silhouettes are popular in both fashion and interior design. How to Incorporate Appliqué into Your Embroidery Projects If you’re new to appliqué or looking for inspiration, start with simple designs like hearts, stars, or basic shapes, and work your way up to more complex patterns. Consider using digitized embroidery designs to ensure precision, especially for more intricate appliqué pieces. Whether you’re working on clothing, accessories, or home décor, appliqué is a versatile technique that allows you to experiment with different fabrics, textures, and colors. For professional results, you can always turn to Punch Digitizing for custom appliqué digitizing services. Conclusion: Get Creative with Appliqué Embroidery Appliqué embroidery offers endless creative possibilities, from adding personal flair to clothing to creating bold, textured home décor pieces. As this technique continues to evolve with trends

Things to Know About Applique Embroidery Read More »

How to Choose Best Embroidery Digitizing Company in USA

Choosing the Best Embroidery Digitizing Company in USA

Choosing the embroidery digitizing company like Punch Digitizing is a very delicate job and it is very important to choose a company that you can fully trust. Nowadays, most companies offer their services online, so there is no need to tire yourself with the questions of where and how far the company is located to use their offers. But certain procedures do need to be taken care of to offer a good company fit for your digitizing specifications for embroidery. When looking for the best company to focus on, there are some of the key elements you have to take care of. Get the Best Embroidery Digitizing Partner for Your Business in USA Ensure high-quality embroidery designs with the right digitizing company. Get a free consultation to find your ideal digitizing partner. Get A Free Consultation Quality assurance: The quality of the digitization service is one of the most important elements. Since digitizing relies heavily on the machines and technology used, it is also important to check how and what enhanced technologies, consistent computing, and software are used for digital embroidery artwork. Knowing the overall market importance and public performance of the company you are going to be affiliated with is strongly recommended. Mostly the reasons for the achievement and failure of a project provided to a service provider are the program software and facilities used. The services provided by the Embroidery Digitizing Company Knowing the service chart of your likely digital business option is the second most cherished element. The company should also offer a range of services at a time, such as free backup of your artwork, promotional discount deals, a combination of time-based processes, and distribution of techniques, cheap digitizing pricing is not enough. If you are unsatisfied with the conversion value, the company should reconvert the design with a 100 percent money-back guarantee free of charge. Promotional and Curtailed Embroidery offers. To make their services more accessible, you can feel free to ask the digitizing company about the deals they have for their customers. Their offers and discounts give you an idea of competitiveness, relation to the market, and actions towards new customers. Embroidery Digitizing Consumer Reputation. A strong reputation and word of mouth mean a lot when deciding to work with a digitizing company. A business should have a good customer service unit network where questions and the customer’s embroidery requirements should be taken care of directly as a primary choice. You should ensure they provide excellent and authentic customer support programs before selecting the company for your job. Timeliness of the Embroidery Digitizing Company. For a time-driven company-like Embroidery Digitizing, time is a crucial factor in producing the results of the designs with absolute perfection on time. If the digitizer is unable to keep up with the deadlines and does not turn in the assigned project at the agreed time, then what is the use of digitizing discounted costs? There is no question that the delivery period is a fundamental element in determining the performance of your business. So the principles of turnaround time and punctuality are essential for the success of a potential supplier services company.

Choosing the Best Embroidery Digitizing Company in USA Read More »

digitize your logo

How to Digitize Your Logo for Embroidery

Embroidery machines do not read the same file types as your computer can, so before they can do their job, you have to digitize your logo so that the machines can understand. From the viewpoint of a digitizer, this typically involves taking a JPG or PNG image of a customer’s corporate logo or artwork and converting it into an embroidery file. The type of embroidery file is determined by the type of embroidery machine you’re going to use. Punch digitizing will guide you each and every step. Want To Professionally Digitize Your Logo for Your Business? Let Punch Digitizing transform your logo into a flawless embroidery design with expert precision and care. Get Free Quote Now How to Digitize Your Logo You will move ahead with converting the artwork or emblem into the correct file form once you know what kind of embroidery machine you’re working with. You’ll need to have digitization software built on your computer to do this. For commercial digitizing, our Senior Digitizer recommends Wilcom Advanced Digitizing Tools. Brother Embroidery Design Software, Husqvarna Premier+ Embroidery Software, Janome Digitizer Software, and Embird Machine-Independent Embroidery Software are other common digitizing software. Follow the steps below once you’ve selected the embroidery software. 1. Upload your logo You will insert your logo or design file (JPG, PNG, etc.) into the software in this first step and crop out any unwanted blank space around the image that you want to embroider. 2. Set Embroidery Design Size For your embroidered logo or design, enter your desired dimensions. This will be the exact size that your image will appear on your object, so make sure to measure the available space for embroidery carefully! Once you have it just right, before moving on to the next stage, make sure to lock the picture. 3. Pick Your form of stitch A range of different types of stitches is used to achieve different looks, textures, and more. Each type of stitch has a maximum stitch length that must be considered. When choosing your stitch styles, you should also remember the fabric and the “push and pull” of the garment. Here are the three most common stitch styles for machine embroidery. Straight Stitch The straight stitch is a simple embroidery stitch in which straight lines of stitches are repeated to create a pattern. By repeating a straight stitch several times, you can create thick lines. It is important to remember that straight stitches can be used for curved shapes, not just straight lines! Satin Stitch If you want text embroidered, then the satin stitch is probably the type of stitch for you. Satin stitching has a longer thread length that gives it a shiny look that works well for lettering. 12.1mm is the maximum stitch length for satin stitches. Fill Stitch Often known as the tatami stitch or the ceding stitch, as its name implies, the fill stitch is usually used to fill patterns. Filling stitches use alternating lines to give a woven look to the embroidery. For filling stitches, the maximum stitch duration is 4mm. 4. Set Stitch Direction Setting the direction of the stitch is simply making a road map to follow your embroidery machines. You’ll tell the machines to provide step by step instructions for each stitch in this step. Different stitch patterns may be used to achieve the appearance of various contours, textures, and colors. Too many trims hops and an unsightly machine pattern will result from skipping this stage. You’ll also save time and thread by having a successful stitch path! 5. Set Your Embroidery Thread Colors From the color bar, choose your embroidery thread colors. Be sure to match the colors of the embroidery thread to your Pantone corporate logo colors. Check out our PMS Color Matching Chart if you’re unsure what your Pantone colors are and then display them in thread form in our Embroidery Thread Color Guide. 6. Transfer the File to Your Embroidery Machine Transfer to your embroidery machine your converted embroidery file (dst, exp, jef, etc). Using a USB cable, flash card or directly from the device running the embroidery software, this can be achieved. 7. Prepare the Embroidery Machine for Embroidering To get your embroidery machines ready to stitch out your digitized company logo or design, you need to take a few steps. By choosing the correct needles, threads, orientation, and embroidery series, you first need to notify the computer about the design elements. Make sure your computer has the colors of your appropriate thread. Then, in your embroidery loops or embroidery frames, put your items or fabric and slide them into the embroidery machine arms. 8. Embroidering a sample, test your digitized logo See your embroidery machine go to work on the logo or design you have recently digitized. This is expected to take just a few minutes! Check the embroidered design once it is completed to see if you need to make any digital changes before embroidering your items. Make the modifications and evaluate again if necessary until you’re pleased with the result. Then you are ready with your perfectly digitized logo to embroider items!

How to Digitize Your Logo for Embroidery Read More »

Is There a Free Embroidery File Format Converter?

Embroidery file formats are the way to save an embroidery design to be stitched out on a particular embroidery machine brand. Some brands of embroidery machines (such as Brother or Bernina) need different file formats for embroidery design (such as PES. or ART.). For an embroidery file format to be read or understood by an embroidery machine, the native language known by a brand of embroidery machine must be spoken. We are all familiar with computers since there are PCs & Mac computers. Some programs & files are created to run only on a Laptop, as you well know, while some files are created to run only on a Mac. In other words, a PC or Mac-based operating system is proprietary to those programs & files. They’re running on one or the other only. For embroidery file formats, the same thing goes. A particular embroidery file format (e.g., PES.) is proprietary to a separate brand of embroidery machines (example: Brother) Simplify Your Embroidery Projects with Punch Digitizing Create professional-quality embroidery designs with ease using punch digitizing techniques. Get A Quote Now The development of embroidery file formats There was just a stitch there a few years before. A running stitch was created from that stitch, a satin stitch, and then a filling stitch. All began with a single stitch. That was over 35 years ago, and since I started my career as a manual pantograph puncher, I must admit that much has changed. In the early days of embroidery automation, by reading Jacquard paper tapes, Schiffli looms ran. These tapes were the first embroidery file format, and it operated inside a mathematical base, much like today. By its reader, the “automat” fed the tape at the end of the loom. The reader consisted of pins that would release the paper tape through the holes and send the computer commands, just like old paper tape music boxes. I’d shift X or Y (direction), launch machine functions such as needles in or needle out, slow or quick speed, boring plate in or out, and a command to adjust stop/color. Our modern computers, in many respects, function in a very similar way. Embroidery File Types by Machine dst: embroidery file format for Tajima commercial embroidery machines exp: embroidery file format for Melco commercial embroidery machines jef: embroidery file format for Janome commercial embroidery machines kwk: embroidery file format for Brother commercial embroidery machines dsb: embroidery file format for Barudan commercial embroidery machines tap: embroidery file format for Happy commercial embroidery machines Free embroidery file format converter options Your best choice for converting embroidery files from one format to another is possibly Wilcom Truesizer. You first have to register on their website to gain entry. Then, you can choose to download the software’s desktop edition or use the web-based option. I have used the web-based version of Wilcom Truesizer since the desktop version only runs on a PC, and I operate on a MAC. Another choice is to use EmbroideryDesigns.com’s web-based tool. I went to their site, built an account and transformed one of my embroidery designs from a PES to a DST file. It seemed the conversion went great. But (here’s the catch), the site only lets you convert five files for free every month. Is this possible to convert a bunch of embroidery files at once? Yes. A whole set of files can be transferred from one type of embroidery file format to another. It’s called “batch conversion.” If you have a group of files that all need to be transferred to a particular format, batch conversion is helpful. I realized quickly that I needed to be able to batch convert when I began digitizing. It just took too long to save each design individually. Plus, I would not save my file in all the formats I wanted to give my clients with my digitizing program. So, I set out to look for inexpensive software for batch conversion. Many of the major digitizing programs these days have a batch conversion feature.

Is There a Free Embroidery File Format Converter? Read More »

dst file embroidery

What is a DST File in Embroidery and How to Use It?

When you work with machine embroidery, you often come across DST files. These files are essential because they turn your designs into stitch-ready patterns that your embroidery machine can read. But what exactly is a DST file, and how do you use it in your projects? At Punch Digitizing, we help you create high-quality embroidery designs by converting them into DST files. Let’s explore what a DST file is, why it’s important, and how you can use it effectively. 1. What is a DST File in Embroidery? A DST file (Data Stitch Tajima) is a file format that contains stitch commands for embroidery machines. Developed by Tajima, one of the leading brands in embroidery machines, the DST format is widely used across the industry. This format tells your machine where to place each stitch, what stitch type to use, and the order in which to stitch the design. DST files contain all the technical details your machine needs to stitch a design accurately. From stitch placement to direction, it includes everything necessary to turn your digital design into a reality on fabric. 2. Why Do DST Files Matter? DST files matter because they provide universal compatibility with most commercial embroidery machines. Whether you’re working on a home machine or an industrial setup, a DST file ensures your design stitches smoothly without the need for further adjustments. Here’s why you should use DST files: Compatibility: Almost all commercial embroidery machines support DST files, so you won’t have to worry about converting the design again. Efficiency: The DST file holds all the stitching instructions, making the embroidery process faster and more streamlined. Precision: With a DST file, your machine follows exact stitching directions, leading to accurate, professional-quality results. 3. How to Use DST Files for Embroidery Using a DST file is simple, and it starts with digitizing your design into this format. Let’s walk through the steps to use DST files in your embroidery projects. Step 1: Digitize Your Design Before you can load a DST file into your machine, you need to digitize your design using embroidery software. If you don’t know how to digitize, Punch Digitizing offers professional digitizing services to create embroidery-ready DST files. To digitize your design: Open your design in embroidery software such as Wilcom, Hatch, or Embrilliance. Assign stitch types, directions, and other settings to your design. Save the file as a DST format. This file now contains all the stitching instructions your machine will need. Step 2: Load the DST File onto Your Embroidery Machine Once you have the DST file ready, you’ll need to load it into your embroidery machine. Depending on your machine, you can do this by: USB drive: Copy the DST file onto a USB drive and insert it into your machine. Direct connection: Connect your computer to the machine via a USB cable and transfer the file. Wi-Fi: For modern embroidery machines, you can wirelessly transfer the DST file using Wi-Fi. Step 3: Set Up Your Fabric and Thread Before starting the embroidery process, make sure your fabric is properly hooped and stabilized. Select the right thread colors for your project. Some DST files include color information, but if not, you can manually select the colors on your embroidery machine’s interface. Step 4: Start Stitching Once your fabric and thread are set up, you can begin stitching. The embroidery machine will read the DST file and follow the stitch instructions to recreate the design on your fabric. 4. Benefits of Using DST Files in Embroidery Using DST files offers several benefits that make the embroidery process smoother and more efficient: Universal compatibility: DST files work with nearly all commercial embroidery machines, making it easier to share or use designs across different platforms. Accurate stitching: With the precise stitch instructions embedded in the file, you can avoid errors or misaligned stitches. Efficient workflow: DST files simplify the setup process, allowing you to move from design to embroidery without lengthy adjustments. 5. How to Convert Other Files to DST Format If you have a design in a different format (like a .JPEG, .SVG, or .PES), you’ll need to convert it to DST format before using it with most commercial embroidery machines. You can easily do this using embroidery digitizing software. To convert your design: Import your existing file into the embroidery software. Use the software to digitize the design, assign stitches, and make any necessary adjustments. Export the design as a DST file. If you’re unsure how to do this, Punch Digitizing offers digitizing services that convert any design format into a DST file for embroidery. 6. Troubleshooting Common DST File Issues While DST files are reliable, you may encounter some issues. Here’s how to solve common problems: Corrupted file: If your DST file gets corrupted during transfer, try re-saving or re-exporting it from the original design software. Missing thread colors: If the DST file doesn’t include color data, manually set the thread colors using your machine’s interface. Stitch errors: If your machine isn’t stitching the design correctly, review the stitch directions and paths in the original digitized file to ensure they were set up correctly. Conclusion: Simplify Your Embroidery with DST Files DST files are the standard for machine embroidery because they provide the precise stitch instructions needed to create detailed, professional designs. By digitizing your designs into DST format, you ensure compatibility with most embroidery machines and streamline your workflow. Contact Punch Digitizing, we can help you convert your designs into high-quality DST files, ready for any embroidery project. Our digitizing services  make the process easy, whether you need a simple logo or a complex, multi-color design. Get started today and take your embroidery to the next level!

What is a DST File in Embroidery and How to Use It? Read More »

How to Do 3d Puff Embroidery on Hats | PunchDigitizing

How to Do 3d Puff Embroidery on Hats and Best Practices for 3d Embroidery

Here, we will talk about how to do 3d puff embroidery on hats? 3D puff embroidery is simply an art. It is the talent of a digitizer who makes the utmost effort to develop eye-catching designs. The embroidery of 3D puff is distinct from simple designs. There is a deepness in the artwork on 3d models. We will explore 3D embroidery for hats in this post. To get the best performance, we will also explore some tips to perform better. When you want to have custom artwork, the 3D puff style is relatively pricey. Depending on the quantity, material, and embroidery design you want on your hat, the charges will vary. The work is done in the digital age by computer software and embroidery machines. The embroidery of 3D puff is itself an art that involves practice, practise and practise. The more interest you get, the easier it will be to strengthen your weak areas. There has been an ever-increasing demand for 3D designs over the past few years, particularly for hats. Staying true to best practises in 3D puff embroidery means achieving better outcomes and low cost and time in manufacturing. If you master the ability to digitize 3D puff embroidery, you can surpass your competitors in the following fields. Here, we will talk about some of the best practises for 3D embroidery that can benefit you in the long run. 1. Set the speed of your machine It is essential to decide your embroidery machine’s ideal speed because it determines the embroidered designs’ efficiency. According to your instructions, you will also need to slow the pace down. For each embroidery machine, the maximum speed is different. A good approach is to run a few different speed tests to decide the optimum speed that will yield the best results. 2. Your fabrics matter a Lots Consider using 3D puff fabrics that are prone and slippery. There are two explanations for that. First, the stitch density of 3d puff embroidery is higher than standard designs. Second, the surface is more susceptible to vibrations in the hoop when dealing with rubber. Therefore, dense, stable fabrics are favoured, like those in caps. Noble fabrics like towels often don’t go well with 3D puff embroidery. The 3d effect fades their own loft and thus fails to appeal to a convincing design. 3. Creating Stops And Laying The Foam If the flat design is finished, you can build a stop. As this is something that you will need a lot in your career as you deal with 3D puff embroidery, you need to learn how to programme stops in your machine. You need to make sure the system offers sufficient stops on colour changes. 4. Making The Outline Before embroidering with satin stitches, you need to create a template outline after laying the foam and making a stop. The zone that can be broken down will stabilize this outline. Due to the foam, the set-up is increasingly unstable. The foam is sticking to the material due to this. Stitching a sketch by presenting foam with the ‘split.’ counteracts this inherent uncertainty. 5. Remove the Foam Excess When the template has been completed, replace the excess foam. If there are small puff bits that are too hard to be collected with bare hands, use a heat source. You should make use of a heat gun to melt the foam. Certain puff parts likely remain trapped. Take them out with tweezers. 6. Do Some Test Runs Try sewing out some test runs while you’re working with a new concept to prevent a mishap. Compare different models and select the best working fabric and equipment. For inexperienced embroiderers, this drill often serves as a training area. This allows them to determine what works and what does not work so well. This enables them to benefit from optimum conditions for real sew-out and related future jobs.

How to Do 3d Puff Embroidery on Hats and Best Practices for 3d Embroidery Read More »